With a portfolio of car images shot pretty-much entirely at nighttime I get emails and forum PMs pretty much daily looking for tips and techniques about lightpainting cars. It's reached the point where I can't answer each one individually but here's a summary of some of the most common answers I've given, all wrapped up into one neat post with pics.
First off, a bit of background. It's taken me years to get into PP so one of the reasons I started lightpainting is because you *can* get great results in a single frame straight out the camera. Doesn't have to be like that if PP floats your boat, just saying. Budget needn't be an issue either, with many of my photos being lit with ghetto solutions. Worried about light spill? cereal box and black duct tape around your £4 LED camping lantern. Can't reach high enough? more duct tape, this time holding your light to a broom handle. Whatever it takes.
The other thing is that for me, LP is all about the reflected highlights - those white lines you get defining the car's form and making it look very studio-lit and contrasty. But there are some occasions where that effect won't work or can't work so at these times you need to do something different.
Right, so let's look at some pics, starting with some older ones using primitive light tools. I've picked photos to demonstrate certain tools/ techniques rather than because they're necessarily great images. On that basis not really looking for C&C on the pics but will try and answer if there's any questions.
Scirocco - single 5min exposure at f/4.
This was lit with a round LED parasol lamp. You've prob seen them for a few quid in ASDA or wherever, about 8" round and a hole in the middle for the parasol to stick through. You can see a bit of light leakage in places but mostly the light was concealed by a small cardboard box to prevent the light itself appearing in shot. Worth noting the overexposed areas on the bonnet don't precisely coincide with the highlights - this is your first clue when it comes to understanding where light falls and how to get your highlights where you want them.
-----
A5 - single exposure (I forget the exif)
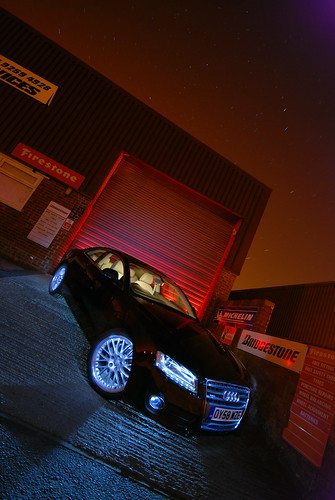
Wheels and grille were picked out with a small torch. Garage door was lit with flash and a red gel. I used several bursts of flash at low power to try and light the car- notice, it did nothing, there's no detail at all in the side panels. Meanwhile...
-----
A5 - single exposure
...more details in the side of the car here though still not perfect, and a narrow rather than broad pinstripe - this was lit with a large 3w LED Maglite with the reflector taken off. Just walked from one side to the other, between the car and camera. To some extent the higher you hold your light, the higher up the car the reflection appears (see the Seat pic further down).
-----
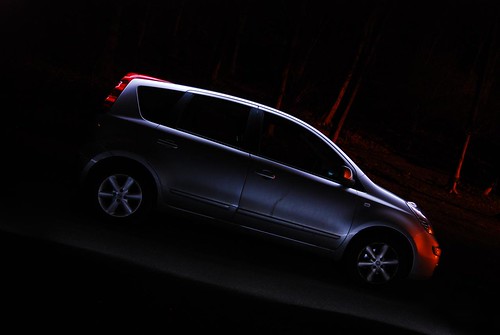
Nissan Note - composited (in camera, using Nikon [I]Image Overlay[/I] function, see flickr page for specifics)
Key here is seeing how the light affected each frame and adding more to suit. The light was a 12v cold cathode which didn't provide a lot of light so I had to get really close to the car, hence the spread isn't that great in each frame. Again I shrouded the light to prevent it being seen in the frame. Background wasn't up to much so I passed behind the car flashing the cathode on and off to give that block finish, and timed the last frame for a passing car.
-----
Lamborghini Diablo - single exposure 4mins f/9
Generally speaking, the darker the colour the better it reflects the highlights of your light source. So, with this bright colour I didn't even bother trying a light drawn around the car. Instead I used a powerful LED torch with its reflector still in place. The technique is pretty much the same as with speedlights: position yourself at several places around the car during the extended exposure. Using a torch (instead of flashes) means you can see exactly where your light is reaching and adjust position accordingly. I remember mostly lighting forwards from the rear of the car so I could keep the black areas of ducts nice and dark. Aside from the watermark this is unedited - hence tripod shadow still in frame haha
-----
Lamborghini Gallardo - 20 sec f/10
The relatively high f/stop was because I wanted to limit spill so only the highlights shone through, defining just the edge of the car. Again it meant the light had to be really close to the car. The light was simply (but carefully) moved from one end of the car to the other. Notice where the light does spill onto the ground there's just a short area of shadow before the car, telling you the light was slightly behind where its reflection appears. This was with a 12v flouro, about a foot long- quite a friendly light source in that it's portable and fairly bright and also gives a nice narrow highlight instead of the broad lines that can be left by softboxes.
-----
Seat Leon
This was a softbox image - massive torch inside one of those portable fold-up thingies. The light spreads really nicely and you can control how much you light your subject by walking faster or slower (or by how close/ far away you are). In this shot I walked along the top of each of the embankments you see. The distance meant more of the scene got lit but the height ended up leaving highlights on the side windows which I normally try and avoid. The highlight on the windscreen is much broader than on the panels but I've now worked out by feathering the light (that is, angling the softbox up or down) you can reduce the width of the reflection.
The other thing to say is about angle of incidence/ reflection. When you're shooting straight on to your car (front/ rear/ side) you can pass through from one side of the frame to the other, starting and finishing a couple of foot either side of the car. You'll get a highlight right the way across your subject. As soon as you move away from straight on, you need to start walking way, way past your subject if you want the highlight to continue right to the end of the panel(s). Light on the road in the Seat pic above shows I walked prob a full car length past the rear of the Leon and the highlight just reaches the back of the rear wing.
And now a final word on shadows: moving along the car with a light tends to eliminate what we think of as natural shadows and can leave the car looking very pasted in. If you're into PP the best way around this is with a frame for the ground level that retains a shadow from somewhere - you can create this with your own light or use the shadow from a nearby streetlamp or whatever.
If you like to leave your images untouched then the only way I've really come up with is to light underneath the car from behind which, although not always as convincing, has the benefit of adding fantastic texture to the surface. Bear in mind though, unless you're shooting on pale concrete it takes a lot of light to brighten up a dark road surface!
Well, that's all I can think of unprompted and I hope it's useful. If you've read it through and still have questions, fire away in the comments and I'll try and answer publicly for the benefit of future readers.


This is fantastic write up, it's inspired me to go an do a few shots as soon as I get a chance, thanks for taking the time to explain.
ReplyDeleteHi Andy
ReplyDeleteNice pixs! Can I ask what do you do to not appear as a ghost in the pictures? Wearing black clothes?
Cheers
Yeah, wearing black clothes helps but mainly it's about the relative darkness away from where the light's shining. Look at how dark the unlit areas are, and that's after the full exposure length. If I'm moving about and only in the same place for a couple of seconds at a time there's no real chance I'm going to appear as a ghost. Thanks for the Q.
ReplyDeleteAwesome post! I am definately going to give these techniques a try. Thanks for sharing.
ReplyDeleteYou're pure awesomeness that you're sharing your techniques so freely - much thanks! I love automotive photography and will try this as a new trick in the bag... if I find somewhere dark enough to try it! (in vegas)
ReplyDeleteGreat post Andrew, thanks for sharing. I'd love to attend one of your courses, but crossing the ocean isn't an option for me. Is there any chance you'd ever share images of the light painting tools you use for your car shots? I can't find anything that makes sense when I search for "parasol lamp" for example. I run into this regularly: lots of great tips from your neck of the woods, but no clue what the terms for your tools mean!
ReplyDeleteHelp a Yank out?!?!?! (grin!)
My flickr: jcowiephoto
Seriously great read Andrew! love these images and very inspiring! I've done bits and pieces with painting techniques but never on cars so might have to go have a play around later :D
ReplyDeleteOne question: on the last image, the Audi. Do you use the headlights for the flare effect or some other technique?? many thanks!
RRB - starbursts are from the car's lights, as is the light on the ground in front of the car. Thanks for your interest
ReplyDeleteJust a few quick questions: How quickly do you move around the car? I guess I'm asking how much light is needed for it to show in the photo. Also, were any filters used?
ReplyDeleteBookmarked - great advice :)
ReplyDeleteThanks for the great tutorial. I've been planning to do some cars and some of these ideas will save a lot of trial and error. There will be plenty of that anyway! Thanks again.
ReplyDeleteThis comment has been removed by the author.
ReplyDeletebest desinging of these cars.i wish to have one.used cars
ReplyDeleteThis comment has been removed by the author.
ReplyDeleteI guess this could be only done by using Photoshop :) CAn we do it on any houston used cars
ReplyDeleteBook your private transfer from the airport or port of Rome, the best rates, professional limousine service,limousine service in rome italy rome limo transfersa wide range of cars, sedan, van or minivan.
ReplyDeletecivitavecchia rome italy airport - Book your private transfer from the airport or port of Rome, the best rates, professional limousine service, a wide range of cars, sedan, van or minivan.
auto insurance massachusettsThe blog is good enough, keep up writing such type of posts.
ReplyDeleteauto insurance quotesWaooow!! Nice blog, this will be greatly helpful.
ReplyDeleteGreat post guys, you have done the nice job, and solved my problem I was in trouble. Thanks a lot. car insurance
ReplyDeleteHi this is the first visit of mine in your website and in final wordings this is an awesome visit.
ReplyDeleteInsurance Brokers of Maryland
Thanks for the entire information you have given here to impart knowledge amongst us? claimsmate
ReplyDeleteHere I would love to be pleased about your work for fine truth and got educational facts from here. http://Www.traders-insurance.com
ReplyDeleteTruly superb blog, I don’t have actual words to praise in regards for this. www.cheapfleet.co.uk
ReplyDeleteThank you for sharing.Keep it up.
ReplyDeletePeugeot Clutch repair & Porsche Clutch repair
For more information visit
ReplyDeleteused cars bedford
Informative post about the light painting cars with great information. Appreciated for posting this blog!
ReplyDeleteCommute with Luton airport taxi service in London
Fantastic blog! Do you have any tips and hints for aspiring writers? I’m planning to start my own website soon but I’m a little lost on everything. Would you propose starting with a free platform like WordPress or go for a paid option? There are so many options out there that I’m completely overwhelmed .. Any suggestions? Many thanks!
ReplyDeletetaxi to luzern
Workshop for repair and maintenance of all kinds of electrical appliances, gas ovens and cookers in Kuwait, immediate maintenance at home فني طباخات
ReplyDeleteWorkshop for repair and maintenance of all kinds of electrical appliances, gas ovens and cookers in Kuwait, immediate maintenance at home تصليح طباخات
ReplyDeleteWe have innovative solutions to all the problems you face in the gas oven تصليح طباخات الكويت
ReplyDeleteThanks for sharing the blog with us which is very informative about how to light painting care used for limo services and find port canaveral limo service at affordable price.
ReplyDelete